
LESSON 02 / Year 12 · Digital input
Read a logic state.
Read a button and filter contact bounce.
The challenge
Light the LED while the button is pressed and count each press only once. A mechanical contact bounces: one action can produce several electrical transitions.
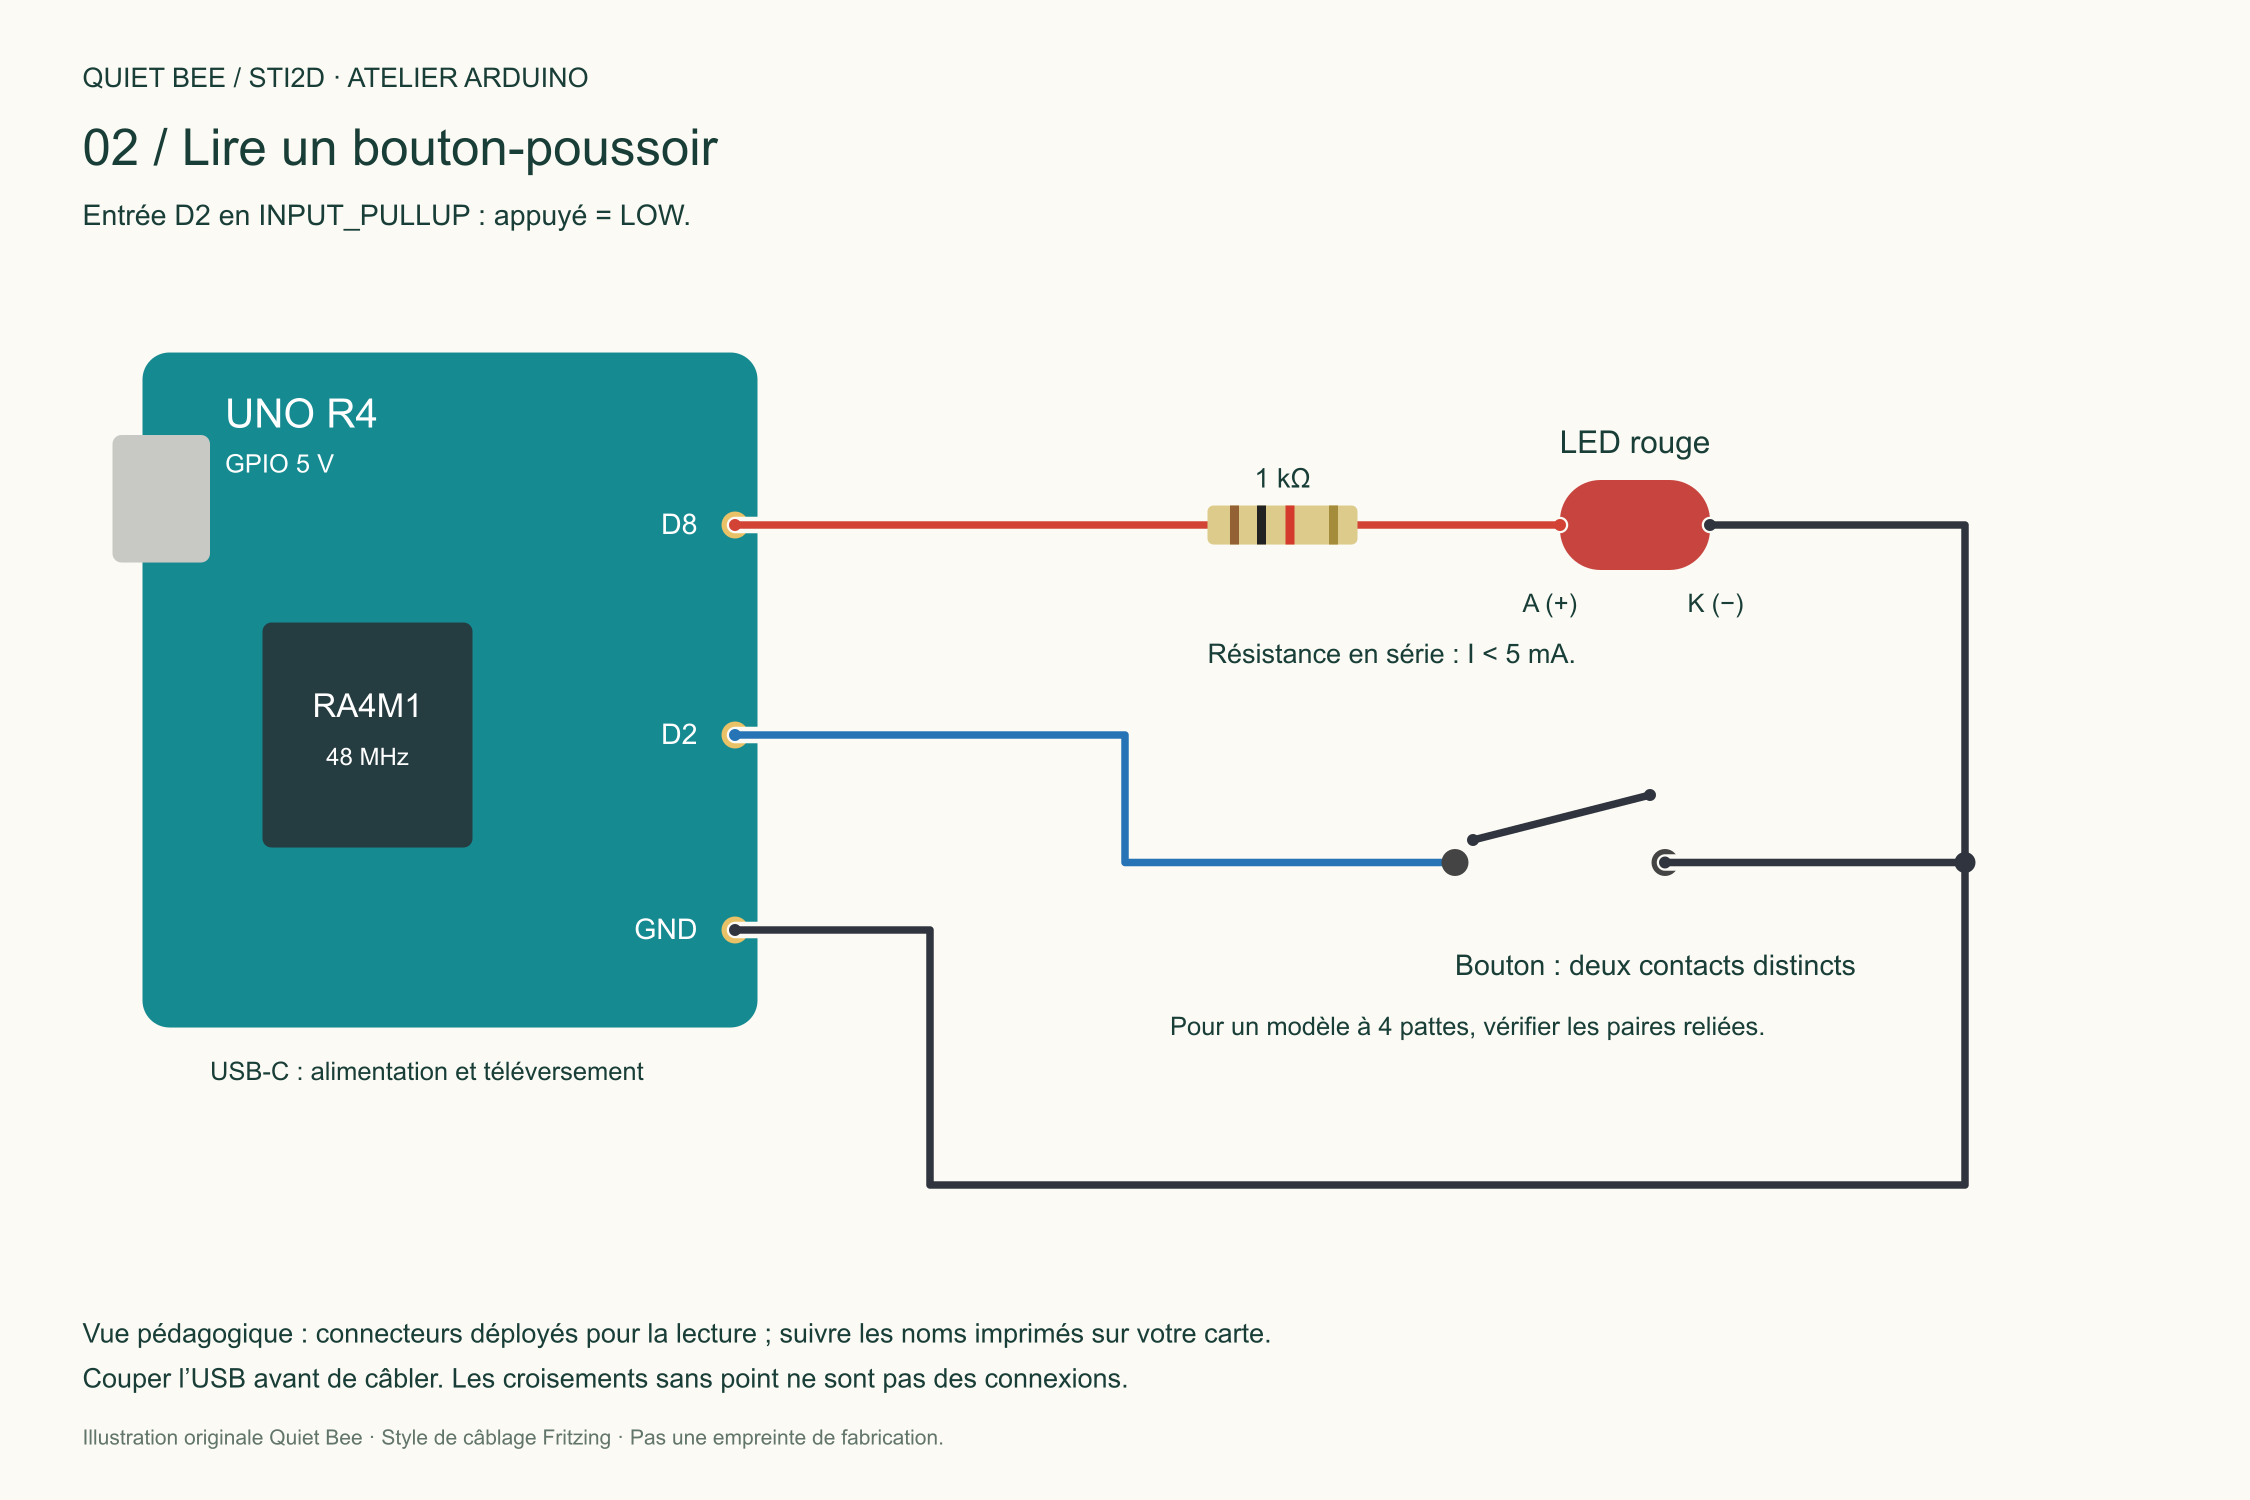
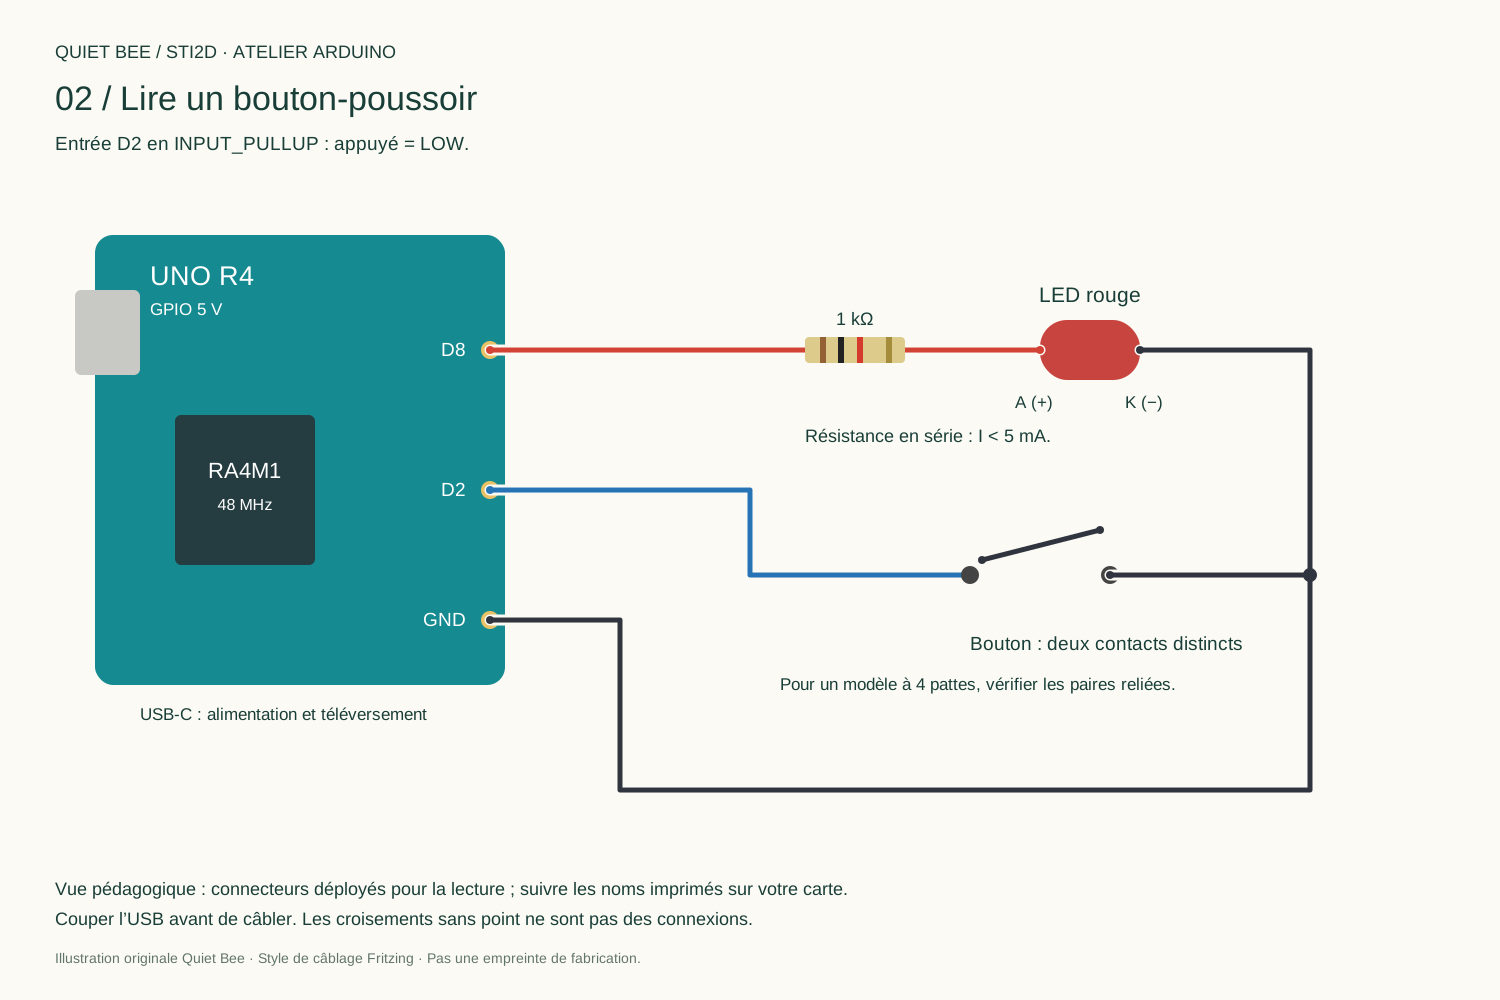
Equipment: the previous LED setup and a normally open button. With four pins, use a multimeter to identify the already-connected pairs; the drawing represents two distinct contacts.
Wiring and logic
| Link | Function |
|---|---|
| D2 → button → GND | Input with internal INPUT_PULLUP |
| D8 → 1 kΩ → LED anode; cathode → GND | Press indicator |
| Button | Reading | LED |
|---|---|---|
| Released | HIGH | Off |
| Pressed for at least 30 ms | LOW | On |
The internal pull-up holds the input high when the contact is open. Pressing connects the input to ground: the logic is active low. No external pull-up resistor is required for this lesson.
The complete program
02_bouton.ino
Complete project ↓// D2 -> bouton -> GND. LED : D8 -> 1 kohm -> anode ; cathode -> GND.
constexpr uint8_t BOUTON = 2;
constexpr uint8_t LED = 8;
constexpr unsigned long ANTIREBOND_MS = 30;
int lecturePrecedente = HIGH;
int etatStable = HIGH;
unsigned long dernierRebond = 0;
unsigned long appuis = 0;
void setup() {
pinMode(BOUTON, INPUT_PULLUP); // Resistance interne : relache = HIGH.
pinMode(LED, OUTPUT);
digitalWrite(LED, LOW);
Serial.begin(115200); // Aucun while(!Serial) : fonctionne sans ordinateur.
}
void loop() {
const unsigned long maintenant = millis();
const int lecture = digitalRead(BOUTON);
if (lecture != lecturePrecedente) {
dernierRebond = maintenant;
lecturePrecedente = lecture;
}
if (maintenant - dernierRebond >= ANTIREBOND_MS && lecture != etatStable) {
etatStable = lecture;
if (etatStable == LOW) { // Front d'appui : un seul comptage.
++appuis;
Serial.print("Appuis : ");
Serial.println(appuis);
}
}
digitalWrite(LED, etatStable == LOW ? HIGH : LOW);
}
The debounce filter
lecturePrecedente stores the raw reading. Each change restarts the timer. A reading unchanged for 30 ms becomes etatStable. The counter increases only on a stable transition to LOW; holding the button does not create a new press.
30 ms is an educational setting to verify. Too short allows bounce through; too long makes the system less responsive.
YOUR TURN / YEAR 12
Press ten times with gaps. Compare the real and displayed counts. What happens when you hold the button?
GOING FURTHER / YEAR 13
Propose a protocol to choose the debounce time and evaluate latency.
Suggested answers
A held press counts once. Try several values, repeat the tests and record errors and response time; choose a justified value.
Next step: Measure a voltage →
SOURCES AND FURTHER READING
Check the documentation.
- Arduino UNO R4 Minima · UNO R4 WiFi
- Arduino: analogue converter resolution
- Arduino: WiFiS3 examples
- Analog Devices : DS18B20
- OneWire · DallasTemperature
- Éduscol: STI2D curricula and resources
Original Quiet Bee content. A suggested progression for working on the information chain, prototyping and validation; it does not replace the curriculum or your teacher's instructions.